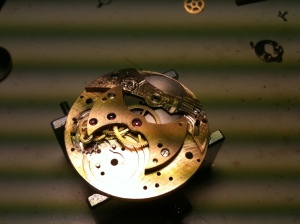
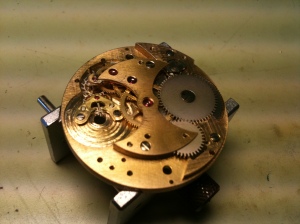
Working backwards in the watch I now need to test that the barrel will play with the rest of the watch and provide the power to keep it going.
I size the hole in the bridge and mainplate, drop the barrel in, and place the bridge on top. The teeth of the barrel are way to tight against the centre wheel, as this is about 2 weeks before heading to Switzerland, I decide that while I need to adjust the model to decrease the engagement of the wheels, in this case I will adjust the barrel, in the hopes that I will be able to have a running movement.
I have also noted that the barrel bridge is still not thick enough, so that if the movement is turned upside down, the lower pivot will fall out completely, to temporarily solve this, I will fit a bush to the bridge, that will stick out far enough to stop this happening.
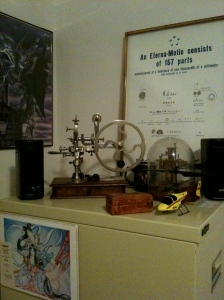
To adjust the barrel I use an antique device called a “topping tool” or “rounding up tool” originally used when wheels were not always perfect, or if they had been stretched during a repair. What this tool does, is to re-shape the teeth to the correct profile, and in my case reduce the diameter of the overall wheel while doing so. This does not work perfectly, especially with modern watches, but for the sake of 20 or so minutes work, is worth trying.
With the teeth reduced sufficiently, the barrel drives the centre wheel, not as smooth as it should be, but it turns!
Back to Pallets
I test fit the pallet bridge on the mainplate, and after adjusting holes in the bridge to try and get it located correctly, realise it will be much easier to just make a new bridge, the basic design is 5 holes with the banking sections (this limits the movement of the pallet fork, on older watches there are 2 pins that fulfil this function).
Off to the computer, and an hour or so later I have 2 bridges cut out (a spare is always handy) I size all of the holes, fit the jewel and steady pins into the bridge and place it onto the mainplate.. Everything lines up, with some minor adjustment to the profile, I am able to work the escapement with some pressure on the barrel. Everything is looking good!
Wind me up
With things looking like I might meet my deadline, I move to a couple of (seemingly) minor components, The ratchet wheel and click, these 2 parts prevent the watch from unwinding all at once. First the ratchet wheel is test fitted on the barrel, with a couple of small modifications due to machining artefacts (leftovers) the ratchet wheel is able to turn freely. The click is similar, and a small hole is drilled by hand into the barrel bridge to accommodate the click spring in the correct place. Turning the ratchet wheel by hand, the click works happily. With some more adjustments, the train bridge is put back in place (I hadn’t noticed that the click would try and occupy the same space as the train bridge, but a file soon sorted that out). Using a screwdriver, the ratchet wheel is wound without the pallet fork in, and the train turns relatively freely, some minor tweaks to wheel locations, and the wheels would be as happy as they were in the original movement. With the pallet fork placed in, and wiggled back and forth, the train unlocks just like a real watch!!


