Many hands…. and a Pretty Face Sunday, Oct 30 2011 

The design brief I gave myself for the hands and dial of the watch were fairly straight forward, I wanted it to be easily readable, while being a bit “special”.

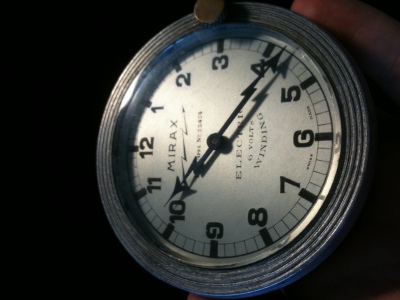
The hand design was basically set as soon as I saw this clock, all that I had to do was reduce the size, and decide on the material to be used.

The inspiration for my hands

The inspiration for my hands

I started by taking a picture of the clock as perpendicular as I could, then importing that into my CAD program, I traced around the hands, and adjusted a few lines to make it look a little smoother. I then reduced the overall size of the hands proportionally so that the very tip of the minute hand would touch the centre of all of the markings on the chapter ring.

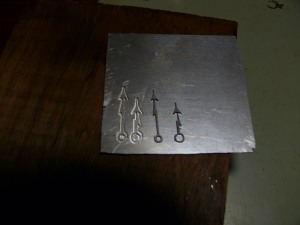
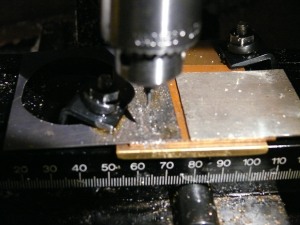
I cut the outline of the hands out using my CNC mill. Just in case, I cut one set out of Titanium, and another pair out of sterling silver.

Cutting the hands

Cutting the hands

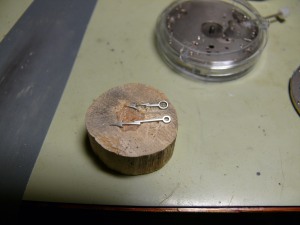
Silver and Titanium hands - Pre-polishing

Silver and Titanium hands - Pre-polishing

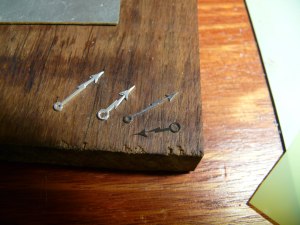
Just looking at the 2 sets side by side, the silver ones are way too thick, I file the rough edges off the titanium set, and do a quick polish of the hands to almost a black polish. While I’d like to anodise these to a nice blue, I am running out of time and if I wreck this set I won’t have the time to re-finish this set.

Titanium Hands

Titanium Hands- pre polishing on their high technology polishing rig

Silver and Titanium hands side by side

Silver and Titanium hands side by side -Post polishing


While I’d like to spend more time to make the dial really special, I know that it will have to be fairly simple.

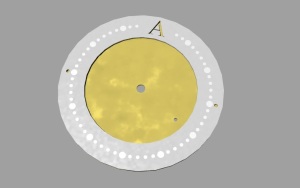
Render of dial

Render of dial


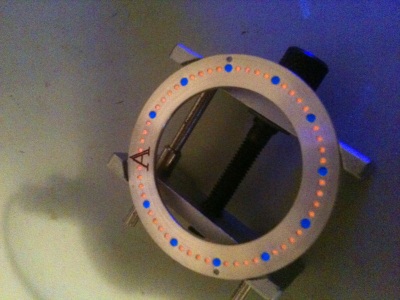
I do a quick mock up on the computer, with a simple silver register ring with different coloured luminous dots, an A at 12 o’clock (for Ashton, I tried using a T but it looked too much like the old Tissot logo), and a reticulated gold centre.

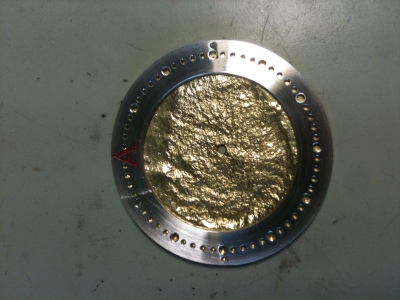
Reticulation is a method of treating the metal by heating and pickling the metal until there is a distinctive difference in the outer layer of the metal to the inside, then heating it to almost melting point, at which time the metal on the inside pulls together, wrinkling the outer layer in a random fashion. While making the entire dial out of this metal would be almost illegible, having the centre made of it will create a nice colour difference from all of the grey and black of the case and register ring.


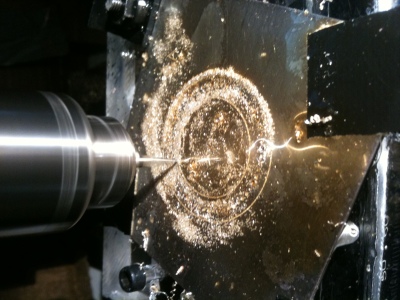
Cutting the register ring

Cutting the register ring


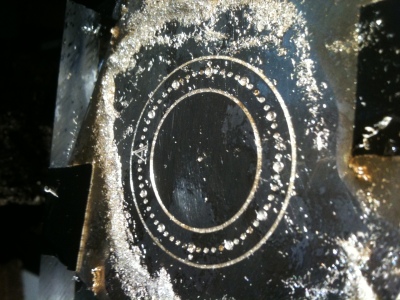
I cut the ring out of a solid piece of silver, with the dots and A pre-engraved, though still needing a little clean up.

Register ring ready for cleaning up

Register ring ready for cleaning up

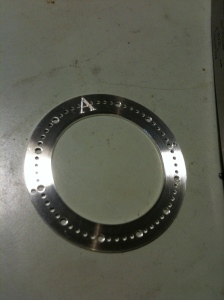
The register ring is satin finished in the lathe, and all of the holes are tapered a bit to allow the luminous material to hold in better.

Register ring cleaned up and satin finished

Register ring cleaned up and satin finished


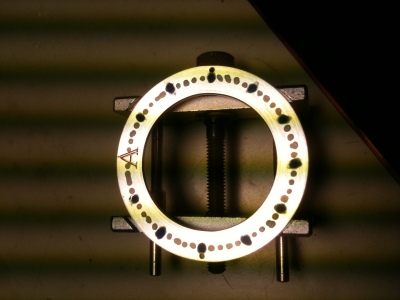
I have a number of luminous compounds, and want to use a blue for the hour markers and orange for all of the minute markers, though these colours are only visible when dark, or under an ultraviolet light. I decide to colour the blue luminous with a blue ink, so that even normally the markers are blue as well. to find a suitable binder or glue to stick the luminous material to the dial takes quite a few attempts, some of them shrink, some are too runny, and others form a putty like substance.. Eventually I get one that sticks to the holes and retains its shape, while still being luminous enough to be visible after dark.

Luminous material in place, but needing to be cut back a bit

Luminous material in place, but needing to be cut back a bit


Register ring cleaned up and under UV

Register ring cleaned up and under UV


I make a piece of reticulated gold, cut a hole for the centre of the dial and also an outline matching the register ring.
Register ring on rough piece of gold

Register ring on rough piece of gold


Gold & silver, pre-luminous

Gold & silver, pre-luminous

Balancing Act Thursday, Oct 6 2011 


Now that the majority of the components are playing nicely together, it’s time to get this machine to tick! The most difficult part of this operation is removing the balance from the old bridge, and transferring it to a new bridge without damaging the hairspring or the small parts on the bridge itself.

Part of the reason for this is that ETA now use their own method of holding the balance to the rest of the watch, this is done with a specially shaped stud, held in tension between a “fork” of metal, this in comparison to the traditional method of a cylindrical or semi-cylndrical stud, held in place with a small screw. The ETA method is more efficient in that the height of the stud is set permanently, and is non-adjustable, but usually requires the purchase of specialised (expensive) tools to do otherwise straightforward operations. While my method is definitely not the recommended method, it works most of the time.. With a quick flick of a screwdriver the balance assembly is free from the old bridge.

The components needed are removed from the old bridge and placed on to the new, and not too surprisingly I can already see some issues.. the first being that the seating for the regulator assembly is a little high, which some quick filing fixes. The balance is fitted to the stud holder, (noting that the hairspring will have to be rotated at some point).

I place the complete assembly into the movement, and try and wiggle the balance wheel into position. No amount of cajoling, tapping or swearing works, as the balance wheel is trying to occupy the same space as one of the train wheels.. Not happy..

The options I have at this point are to adjust the position of the train wheels, re-machine all the plates and hope the next iteration has everything in the right place, make a new balance wheel, or fit the rest of the components to the watch (remainder of the winding mechanism), decorate a base 6498 and case that.

The first option was removed from my choices by simply not having the metal needed to complete another full set of plates, combined with the possibility of something still not working and my deadline rushing up..

The second option while briefly attractive, would require some items for my lathe that I don’t own, and some stock material suitable.

The third option it is!  So the things I need to do while reduced is still fairly significant.