30th December – Start My Engines… Sunday, May 22 2011 

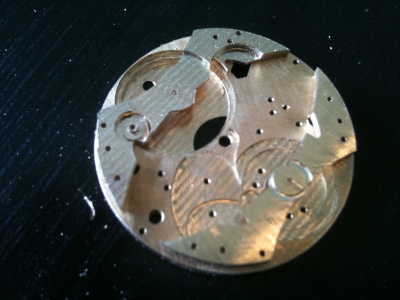
I started machining as soon as possible, a process of around 8 hours solid. only to find that I had gotten confused when translating my measurements to the computer, because of this the recess that holds the barrel was machined too deep, this has the effect of not leaving enough material for the centre wheel jewel to seat into, and also removing some material around the setting mechanism.. Not good!

Re-working the machining file and tooling up, I re-made the mainplate, This time the alignment between the front and back was off by about 0.5mm, as was the next one, so I finally figured out a method of lining the front and back of the plate up a bit more effectively. I had been relying on using locating holes in each plate lining up with matching holes in a perspex machining jig.

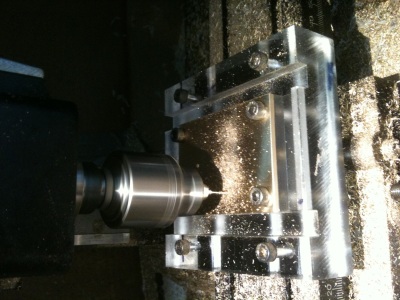
Perspex Jig to hold plates


The new method involves moving a tapered point inside holes in the plate, adjusting slightly, moving to the next hole and so on, until the point is in the centre of all of the holes. Using this method I machined a set of both mainplate and bridges, all appearing to line up within about 1/10th of a mm.

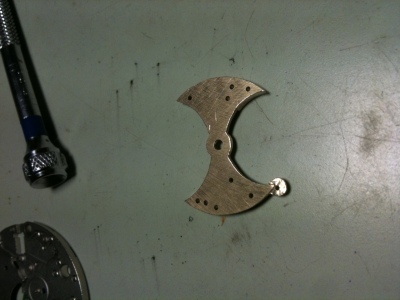
Raw Train Bridge

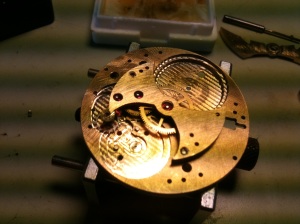
Mainplate with barrel and balance bridges

I enlarged all of the bridge hole to the proper sizes for all of the jewels, and fitted them all, then did the same for the train bridge. As I test fitted the train wheels it became apparent that something was not quite right, the 4th wheel with the extended pivot for the small seconds hand would no longer fit through the jewel.  After a quick modification and removal of the long pivot, the wheel would fit. Success!!  Steady pins were added to the train wheel bridge so that it would locate in the correct place every time, taking a cue from Peter Speake-Marin I made these pins tapered, so that as the bridge is lowered it fits neater than if they had been completely parallel.

Mainplate with train bridge fitted

Short lived success though.. after placing the rest of the wheels in to the plates the first 2 wheels in the train mesh a little tightly and the 3rd and 4th wheel do not touch at all!  and to top everything off, I’ve run out of brass to mill plates out of and most people are closed over Christmas / New Year.. so at least this gives me some time to work on the dial and hands…
Dial Experimentation – Safe Enamelling Sunday, Apr 17 2011 

The “Harlequin” type design I would like to try in a number of ways, my initial thoughts were to make it using “cloisonne” style enamelling where the diamond pattern would be laid out on a flat base, using small pieces of wire to make the closed cells which are then filled with the enamel colour and fired.

Another similar method is to use my milling machine to cut the cells out of a solid plate, which will be less fiddly for me (and give me faster results while I learn) though the borders between each cell will be a bit thicker, so the design will not be as refined.

Milling out Diamonds.. much easier than the alternative...

A 3rd idea I had was to use the Plique a Jour method of enamelling, where the design is cut completely through, and using transparent enamels, whatever is behind the dial will be visible.

The basic technique is the same for all of these. (though I haven’t tried proper cloisonne yet)

Cut out the design needed in copper plate on the milling machine

Copper plate milled for enamelling (already looks pretty good...)

Fill the cells with a mixture of enamel powder (ground glass of a special composition to ensure even expansion) and purified water

Wet Enamel (Transparent) on a copper base

Allow the cells to dry

Cells filled, waiting to be fired in the oven

Fire until the powder fuses into a glass, and fixes to the metal

Allow to cool

At this stage the object would be cleaned, the enamel re-applied and re-fired until the desired effect was reached. In my case as these were all test pieces, I left them at this stage to explore more techniques

As I am quite fond of luminous material as well, I thought I would try doing a semi-enamel technique as well, to be used later with carbon fiber sheet, for this I used what is commonly called a “soft enamel”, really a 2 part resin, that has a hardness that is closer to enamel than most plastics, though I still would not trust it for use in an external area of a watch case.

Plastic, cut out to take luminous material

Plastic cut in Diamond Pattern to take Luminous Material

The product I’m using is called ceramit, the only problem that occurred was that the material I wanted to test has a melting point quite close to the heat required to cure the resin.. so I used more copper instead 🙂

The big advantages of using this product is that it provides a consistent result with little problems, no incredibly hot pieces of glass and metal (a small electric toaster oven is sufficient for curing), can be used on previously finished pieces quite easily, and the luminous material mixes in quite easily as well. There is also less finishing required and the material can be applied quite thinly, easily, whereas for normal enamel this can be very hit and miss to achieve.

Disadvantages are that it is softer than “real” enamel, so can’t be used on external pieces, and is not regarded as real enamelling (rightly so, as the skill required is no where near)

Being much faster to apply also means I can test more pieces faster, see if a design works, then (once I learn enamelling properly) make a “real” version

Test Piece of enamel powder on copper - dry

Test Piece fired, lots more practice needed...