30th December – Start My Engines… Sunday, May 22 2011 

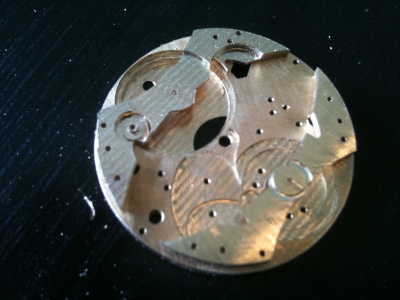
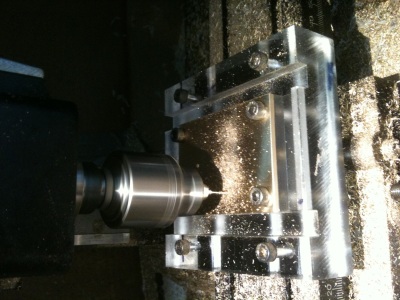
I started machining as soon as possible, a process of around 8 hours solid. only to find that I had gotten confused when translating my measurements to the computer, because of this the recess that holds the barrel was machined too deep, this has the effect of not leaving enough material for the centre wheel jewel to seat into, and also removing some material around the setting mechanism.. Not good!

Re-working the machining file and tooling up, I re-made the mainplate, This time the alignment between the front and back was off by about 0.5mm, as was the next one, so I finally figured out a method of lining the front and back of the plate up a bit more effectively. I had been relying on using locating holes in each plate lining up with matching holes in a perspex machining jig.

Perspex Jig to hold plates


The new method involves moving a tapered point inside holes in the plate, adjusting slightly, moving to the next hole and so on, until the point is in the centre of all of the holes. Using this method I machined a set of both mainplate and bridges, all appearing to line up within about 1/10th of a mm.

Raw Train Bridge

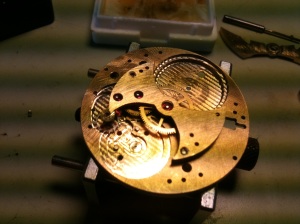
Mainplate with barrel and balance bridges

I enlarged all of the bridge hole to the proper sizes for all of the jewels, and fitted them all, then did the same for the train bridge. As I test fitted the train wheels it became apparent that something was not quite right, the 4th wheel with the extended pivot for the small seconds hand would no longer fit through the jewel.  After a quick modification and removal of the long pivot, the wheel would fit. Success!!  Steady pins were added to the train wheel bridge so that it would locate in the correct place every time, taking a cue from Peter Speake-Marin I made these pins tapered, so that as the bridge is lowered it fits neater than if they had been completely parallel.

Mainplate with train bridge fitted

Short lived success though.. after placing the rest of the wheels in to the plates the first 2 wheels in the train mesh a little tightly and the 3rd and 4th wheel do not touch at all!  and to top everything off, I’ve run out of brass to mill plates out of and most people are closed over Christmas / New Year.. so at least this gives me some time to work on the dial and hands…
Things you discover when remodelling a watch movement… Sunday, May 8 2011 

Some interesting points.

While I tried to reduce the overall diameter of the movement under the original, it ended up being very close to the original (this was actually a good thing – will explain in a later post)

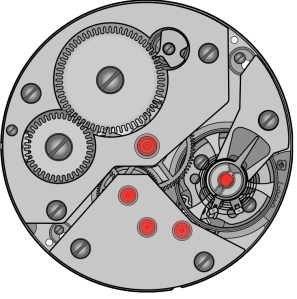
The original movement uses large (2mm outside diameter) jewels on the bridge side of the movement, and small (1mm outside diameter) jewels on the dial side of the movement, while this has little functional effect, I prefer to have nice beefy jewels on both sides, as it looks much better, and I had a few spare due to the number of movements I had bought.

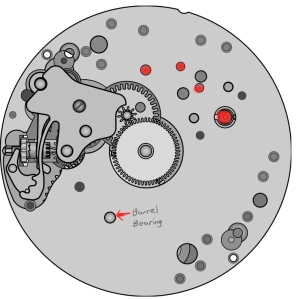
Dial Side, showing jewel sizesBridge side, showing Larger jewel sizes

Bridge side, showing Larger jewel sizes

The original movement uses the manipulate itself as the lower bearing for the barrel and this is a common wear point for many watches (looking at you Seiko.. and early Rolex as well..) I decided to replace this with a jewel (coincidentally the same pivot diameter as the centre wheel) although I haven’t found a jewel large enough for the upper bearing, I will use a bronze bushing for this, which at least can be easily replaced.

Because of the way I had moved the train around, the setting mechanism would no longer fit in the orientation that it was originally used, luckily (again) the 6497 and 6498 use a mirror image of the setting mechanism, and with some juggling, I found a spot where everything appeared to play nicely.


Handy!

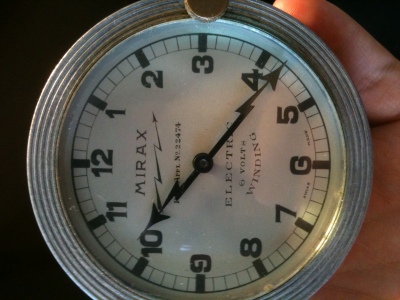
Over the Christmas break I also caught up with a number of friends, amongst whom is a retired engineer who’s father was a watchmaker, he showed me an old electric car clock, and the hands immediately took my fancy, I knew straight away that these shapes had to end up on my watch.

Neat hands, stylish too!

Movement Exchange Sunday, Apr 24 2011 


In September 2010 a work colleague was lucky enough to find a source in Switzerland of “watch kits” using the ETA 6498 movements, these kits usually come with a case, dial, hands and movement in the grade of your choice, while I would have preferred not to, I still had not found a movement available locally cheap enough or in a quantity sufficient to practice movement plate making on (the Vulcain 90 movement I obtained and measured is really too good to work on in the hope it all works the first time) so I placed an order for 4 of the base level of movement, reasoning that once I have plates that work, I can upgrade to the top grade at a later point for the better hairspring, balance and escapement (and throw away the decorated plates). Even for these 4 movements it cost the same as it would have to obtain 1 locally!

Unitas/ETA 6497

I set about measuring all of these components (getting good at this bit 🙂    ) and re-drawing them in a basic form in the computer, to rearrange their layout into the barrel shaped movement I had planned out earlier.

In December 2010 I discovered that I would be sent to Switzerland early in 2011, and reasoned that it would be good if I had a nice watch to wear while over there, I also found out that I would miss the SIHH/GTE 2011 by arriving a few weeks after it finished, and miss Baselworld 2011 by leaving a few weeks before it would start.. Doh!

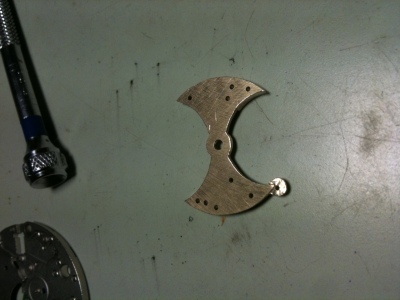
With a firm deadline now on the cards, I started fine-tuning my design, was about half way through, then realised there was no way that I would be able to obtain a glass for the front of a barrel shaped case in the timeframe available (the parts supply outlets that I would use are closed over Christmas / early January and with any sort of lead time it would be marginal at best). To this end I started re-designing the movement to fit a round case, using a variant on the bridge design that I prefer (called the Batman bridge by more than a few now)

Bridge Layout... Nana nana nana Batman!

On the 28th of December, I finished the layout of the movement (during the Christmas / New Year break), and started programming the machining to be done on my mill.

Movement Layout re-organised