Movement Exchange Sunday, Apr 24 2011 


In September 2010 a work colleague was lucky enough to find a source in Switzerland of “watch kits” using the ETA 6498 movements, these kits usually come with a case, dial, hands and movement in the grade of your choice, while I would have preferred not to, I still had not found a movement available locally cheap enough or in a quantity sufficient to practice movement plate making on (the Vulcain 90 movement I obtained and measured is really too good to work on in the hope it all works the first time) so I placed an order for 4 of the base level of movement, reasoning that once I have plates that work, I can upgrade to the top grade at a later point for the better hairspring, balance and escapement (and throw away the decorated plates). Even for these 4 movements it cost the same as it would have to obtain 1 locally!

Unitas/ETA 6497

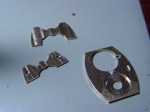
I set about measuring all of these components (getting good at this bit 🙂    ) and re-drawing them in a basic form in the computer, to rearrange their layout into the barrel shaped movement I had planned out earlier.

In December 2010 I discovered that I would be sent to Switzerland early in 2011, and reasoned that it would be good if I had a nice watch to wear while over there, I also found out that I would miss the SIHH/GTE 2011 by arriving a few weeks after it finished, and miss Baselworld 2011 by leaving a few weeks before it would start.. Doh!

With a firm deadline now on the cards, I started fine-tuning my design, was about half way through, then realised there was no way that I would be able to obtain a glass for the front of a barrel shaped case in the timeframe available (the parts supply outlets that I would use are closed over Christmas / early January and with any sort of lead time it would be marginal at best). To this end I started re-designing the movement to fit a round case, using a variant on the bridge design that I prefer (called the Batman bridge by more than a few now)

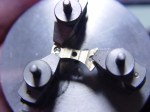
Bridge Layout... Nana nana nana Batman!

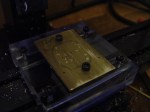
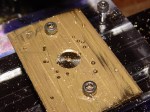
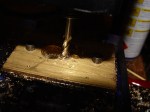
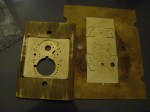
On the 28th of December, I finished the layout of the movement (during the Christmas / New Year break), and started programming the machining to be done on my mill.

Movement Layout re-organised
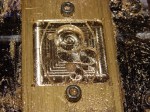
Dial Experimentation – Safe Enamelling Sunday, Apr 17 2011 

The “Harlequin” type design I would like to try in a number of ways, my initial thoughts were to make it using “cloisonne” style enamelling where the diamond pattern would be laid out on a flat base, using small pieces of wire to make the closed cells which are then filled with the enamel colour and fired.

Another similar method is to use my milling machine to cut the cells out of a solid plate, which will be less fiddly for me (and give me faster results while I learn) though the borders between each cell will be a bit thicker, so the design will not be as refined.

Milling out Diamonds.. much easier than the alternative...

A 3rd idea I had was to use the Plique a Jour method of enamelling, where the design is cut completely through, and using transparent enamels, whatever is behind the dial will be visible.

The basic technique is the same for all of these. (though I haven’t tried proper cloisonne yet)

Cut out the design needed in copper plate on the milling machine

Copper plate milled for enamelling (already looks pretty good...)

Fill the cells with a mixture of enamel powder (ground glass of a special composition to ensure even expansion) and purified water

Wet Enamel (Transparent) on a copper base

Allow the cells to dry

Cells filled, waiting to be fired in the oven

Fire until the powder fuses into a glass, and fixes to the metal

Allow to cool

At this stage the object would be cleaned, the enamel re-applied and re-fired until the desired effect was reached. In my case as these were all test pieces, I left them at this stage to explore more techniques

As I am quite fond of luminous material as well, I thought I would try doing a semi-enamel technique as well, to be used later with carbon fiber sheet, for this I used what is commonly called a “soft enamel”, really a 2 part resin, that has a hardness that is closer to enamel than most plastics, though I still would not trust it for use in an external area of a watch case.

Plastic, cut out to take luminous material

Plastic cut in Diamond Pattern to take Luminous Material

The product I’m using is called ceramit, the only problem that occurred was that the material I wanted to test has a melting point quite close to the heat required to cure the resin.. so I used more copper instead 🙂

The big advantages of using this product is that it provides a consistent result with little problems, no incredibly hot pieces of glass and metal (a small electric toaster oven is sufficient for curing), can be used on previously finished pieces quite easily, and the luminous material mixes in quite easily as well. There is also less finishing required and the material can be applied quite thinly, easily, whereas for normal enamel this can be very hit and miss to achieve.

Disadvantages are that it is softer than “real” enamel, so can’t be used on external pieces, and is not regarded as real enamelling (rightly so, as the skill required is no where near)

Being much faster to apply also means I can test more pieces faster, see if a design works, then (once I learn enamelling properly) make a “real” version

Test Piece of enamel powder on copper - dry

Test Piece fired, lots more practice needed...

Dial Concepts Monday, Apr 11 2011 


During early 2010 I started to do some experimentation with dial manufacture techniques, there are a number of dial designs that I know I want to produce, and what I want the finished product to look like, but knew I needed to at least test a few different methods of achieving these.

Bold, practical

This design has inspiration from pilots watches, I would make this from a white enamel base, with the markers being solid metal with the minute markers polished, and the 5-minute markers covered with luminous material.

I think this will also work with a black base (though with light numerals at the 3,6,9 & 12) as a more traditional pilots-type watch, and would be quite neat if cut from carbon fibre sheet with the metal and luminous inlayed.

Masque Dial

This design I would like to do in a range of materials and schemes,

The most complex being with the diamond pattern done in transparent enamels, so you can see movement parts through the dial, and the mask being carved from gold and held in place over the dial. The more simple versions could be done in two colours or tones and with or without the mask.

I knew that dial designs I want to make will need enamelling, so as far back as 2003 I knew that I would have to learn this technique at some stage, to this end I bought from a colleague a small furnace and some basic enamelling supplies, unfortunately before moving to our current abode there was not a space where I could safely fire up a small metal box to the temperatures required, the garage in our current house is such a place, nice high ceiling, concrete floor in case I happen to drop hot metal or molten glass (very important)

Toaster... at 800 degrees Celcius

As is normal with these sort of things, design is much easier than manufacture, as will be seen in the next post…

Workshop Relocation & Milling Machine Repair Wednesday, Apr 6 2011 

Not much work was done on my watch or movement in early 2010, as I was relocating my workshop from the garage to a spare room in the house, which meant changing the floor from carpet to a floating wooden floor (I’ve tried a carpeted workshop before, not much fun when something goes “sproing”) then moving all of my tools, benches etc..

Original Workshop, Out in the shed

The main reason for this move was that during the previous year, I had noticed an increasing amount of condensation and moisture in the garage, this was especially noticeable on the steel tools I had siting on my bench/shelves etc. Cleaning the rust and other damage to the tools affected left me more annoyed than inspired to do more than a few basic tasks on watches for most of the early part of 2010, and then winter came.

New workshop

The most important tool I have at the moment for the manufacture of many of the pieces I need to make is my small CNC milling machine, in the winter of 2010 I was checking the state of our garage, and noticed a puddle had formed on the workbench next to my milling machine, and then I noticed that the motor and spindle of the milling machine also appeared damp, knowing enough about electrical safety not to do too many stupid things, I unplugged the mill and inspected the electronic speed control, which proceeded to pour out some nice brownish water! Not what I wanted to find.

After some verification with the manufacturer, and a small insurance claim, by late 2010 I relocated the mill (along with anything else that I had left behind previously) to my already cramped workroom,

Fully Loaded Workshop 1

Fully Loaded Workshop 2


Not much room spare, but I can do pretty much everything I need to so far.. Not sure if I can fit a Schaublin 70 in here though (Not that it is likely I’ll need to try in the immediate future)

Anything I deemed that was really too messy for the workshop was left in the garage (though out of spots where it would get wet) or on the kitchen table, things like enamelling tools or substances.

Through the Looking Glass… errr Microscope… Sunday, Apr 3 2011 

Whoops, long time since an update, and a lot has happened in the last 14 months, so this will be broken up in to multiple posts for everyones (including mine) sanity.

Microscope

Microscope

Microscope

I succeeded in procuring my toolmakers microscope, with it arriving shortly before Christmas 2009, the only issues I have with it after a number of uses, are that it measures in imperial increments, so conversion to metric is needed, and due to the number of measurements needed, the opportunity for errors is increased, also it has only the one set of optics, and the magnification is possibly a little excessive.

View of a Jewel through the Microscope

The scale in the picture is one graduation equals approximately 1/100 of a mm

Progress (Not the Movement Manufacturer) Monday, Nov 9 2009 

With a new direction comes additional complications (pun intended), when designing a movement from the beginning, all of the dimensions of wheels, pinions etc are arbitrary, in that if it looks good and is mathematically right then it should work, if not then you can adjust dimensions and try again. To use parts from an existing calibre requires measurement of each component that is going to be used, as well as the measurements between components eg the distances between centres of each train wheel, escapement parts etc.

In the normal course of my work I had acquired a variety of equipment, but nothing that would be accurate enough to transfer components from one movement to another. I had been advised (again by Peter Speake-Marin) that an optical comparator was used to derive the measurements that I would require, funnily enough there isn’t one sitting in my workshop, so shopping I would go.

I have managed to derive the location of an optical comparator relatively nearby, but along with most things I require lack the finances needed to acquire it. In a discussion in the workshop I was told that a toolmakers microscope may fit the requirements I have. Back to shopping again, I have sourced and paid for a Leitz toolmakers microscope that will be arriving in approximately 8 weeks from Canada.

Once this arrives I will add pictures of the process used to transfer the components, and any modifications to the components that I will have to make.

Choosing a Donor Wednesday, Oct 28 2009 

So, what criteria should I use to be the heart and circulatory system for my prototype movement? Luckily I had had thoughts on this while designing a custom train over the previous years and worked out the following..

Firstly I want to use a robust train, large teeth on relatively thick wheels, (there goes the ETA automatics..) with a slow moving balance, large barrel for reliable power supply, and a large balance for resistance to minor disturbances

While using a donor movement I want to use one that has been proven to be reliable and robust in it’s own right, with any inherent flaws already discovered and fixed, or at least compensated for. (call me lazy if you want, but I’m going to have enough problems of my own)

The donor movements have to be readily available for a reasonable price, and be uniform in production. Unfortunately this rules out some brilliant movements by itself, I would love to use the Omega 30mm series, but trying to buy more than one in good enough condition is hard enough.. 5 or so that i expect to use, not likely! This also rules out some nice vintage calibres, early Jaeger, Piguet etc.. Due to cost, hopefully in the future I’ll be in a position to revisit this as a new project ala Kari Voutilainen and his Longines’ if I can find a suitable movement.

The movement components must be similar in dimensions to the movement I plan to make, as this will reduce my re-work time, hopefully by a considerable amount and will also simulate the pressures on components.

The movement components should be of good quality, in both materials and production. In my time at the bench I have seen watches disintegrate from within after one or two years of wear, when they have been made from inferior materials, which have worn out and then increased wear in additional components and so on. On the opposite side I have worked on watches that have been running for 20 years or more without maintenance and require little replacement or repair of parts.

With this criteria, and especially with a restriction on the amount I can invest financially, there is one stand out movement.

The Unitas / ETA 6497/6498, used by a remarkable variety of watchmaking firms, from house branded pocket watches to highly decorated versions in Omegas, Panerais and such.

Used for almost 60 years, while still evolving with new technologies, Nivarox balance spring, Incabloc shock absorption, Glucydur balance, all of these technologies have been added as they have come about, but the basic movement has remained the same. The movement is definitely robust, for the cost is quite impressively kitted out, and has numerous modules manufactured to give it additional functionality.

While I have worked on these movements before I currently do not have one in my posession, so will be waiting to obtain some to continue my project, as well as waiting on some tooling to measure components also (see next post).

Pictures from the Milling Process Thursday, Oct 22 2009 

These are pictures taken while milling my original prototype plate,

I am using a Sherline CNC mill, which while not the most accurate machine in the world, will I hope be suitable for my purposes..

The Initial Plan Friday, Oct 16 2009 

In this post are some of the initial renders of the movement I plan to make, all dimensions are custom, as I plan to make all components (using pre-made jewels, shock settings, hairspring and mainspring.)

Train as Originally Planned

Train as Originally Planned

This movement as designed uses a co-axial extra flat escapment, which will be re-designed to use the normal execution of the co-axial escapement as designed by George Daniels or a standard swiss lever escapement.

The movement as designed also uses a key-wind, key-set mechanism to remove any machining of the mainplate from the sides, due to limitations of my tooling and skills (This may change as i gather more skills).

comp-render-1comp-render-2

I also have considered the idea of PVD black plates with blue sapphire jewels, which I quite like the look of.

l_640_480_C4FE9101-B7F2-48B7-9E74-64DBB89B73C1.jpegl_640_480_BCB90E4A-7731-4D47-9C07-892D9BFA637A.jpeg

Even without wheels made, I decided to machine out a prototype mainplate and upper bridges to check my machining ability if nothing else, they don’t look too bad. The dial side bridge/s definitely need rework however as the layout is quite messy, once I have my new measurements I will start from scratch again, while retaining as much as possible of the original design. (except the front plates)

First post, some background on why.. Thursday, Oct 15 2009 

To be perfectly honest it’s probably a silly idea to want to make a watch from start to finish, but I’m a contrary type of person. If it was easy to do then everyone would be doing it, and while I like the easy way as much as the next person, I feel that this could be my “thing” that people know me for.. 

I also keep having ideas for dials and case materials that I would like to try, which if I were to have made by other people would feel detached from, so learning all the skills required is the best way for me to try everything out…

While I would like to do the whole thing from start to finish in one go, from manufacture of all of the wheels, pinions etc. I sounded out Peter Speake-Marin on my basic plan while he was here in Melbourne on his world tour, with the following advice. (in relation to using a pre-made gear train in a newly made layout of plates)

 “If  you want to do it for yourself as a learning curve then make your life as easy as possible the first time and the learning process will be such that you still learn much along the way, finish the first piece in a shorter time, build your level of knowledge and confidence before designing every element in the second watch. “

One of the main reasons for doing this is to build additional skills prior to manufacturing all components, this will also let me see if my train layout will work, as the way i have planned it allows for maximum barrel and balance wheel size and the uses the smallest amount of space possible for the remainder of the train, this uses different lines of force from the original layout of most gear trains, which may have problems by itself. (The most efficient layout would be a completely straight line of force, similar to the Corum “Golden bridge” )

 I will also be changing the design of my movement to use the standard co-axial escapement as designed by Dr George Daniels, as opposed to the extra-flat version (also designed by Dr George Daniels) or for at least the first finished movement i may use a standard Swiss lever escapement.

As I now have to re-set out my movement from the start before returning to my original plan, I can show the progress as I go, unfortunately it also brings it’s own problems.. First off, which gear train to use?  How to convert the train to my design?  and most important… Would it look good?  

To be continued


Links:

Peter Speake-Marin http://www.speake-marin.com

George Daniels http://www.danielslondon.com/

AHCI http://www.ahci.ch/home.php

Video of Corum Golden Bridge http://www.youtube.com/watch?v=NOdmoGoh3ck

Corum Home Page http://www.corum.ch/

« Previous Page